API Key Connector
At a glance
Configure a connector in 4 steps using an API key or personal access token. This guide covers each step of the configuration wizard.
Before you start
- Access to an Ontologie workspace
- API key or personal access token for the external service
- (Optional) Target entity created in the ontology for linking
Steps
Step 1 — Choose the connector and enter credentials
From Live Data > Connectors, click the desired connector.
The configuration panel opens. Select API Key as the authentication method.
Enter your API key or token in the provided field.
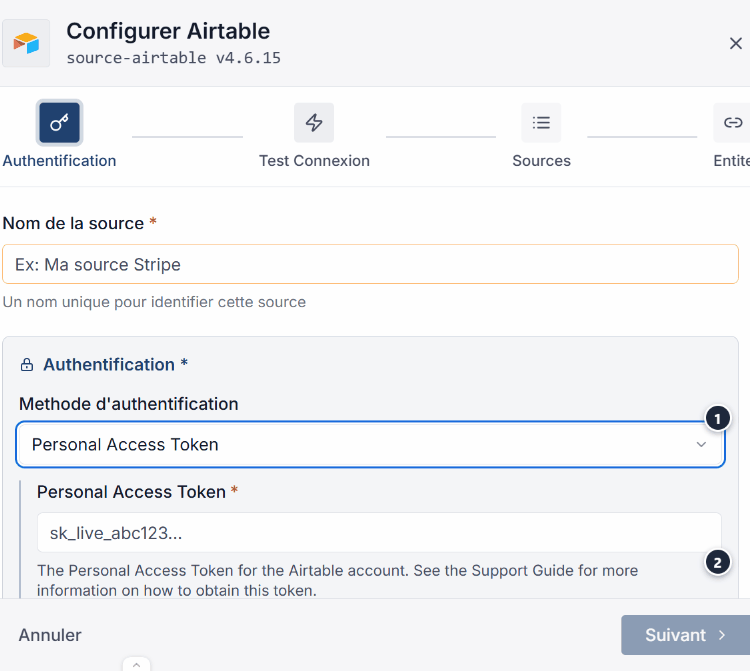
Warning
Never share your API key in source code or shared documents.
Never share your API key in source code or shared documents.
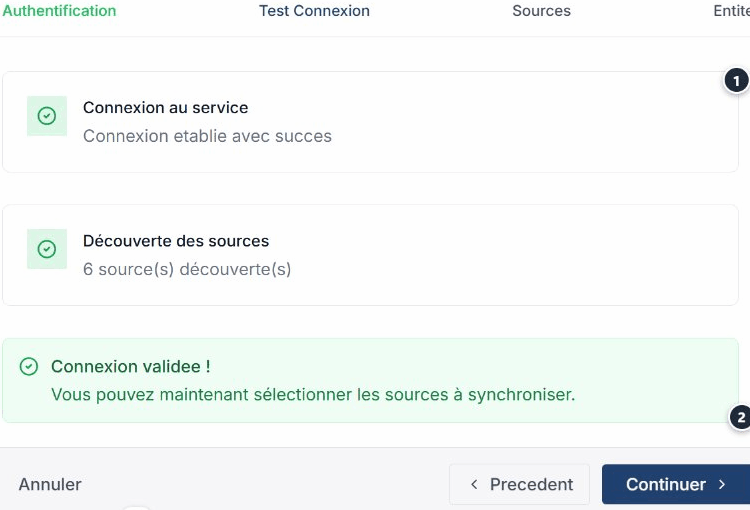
Step 2 — Test the connection
Click Test connection to verify that Ontologie can connect to the source.
If an error occurs, a message is displayed with details to help fix the issue.
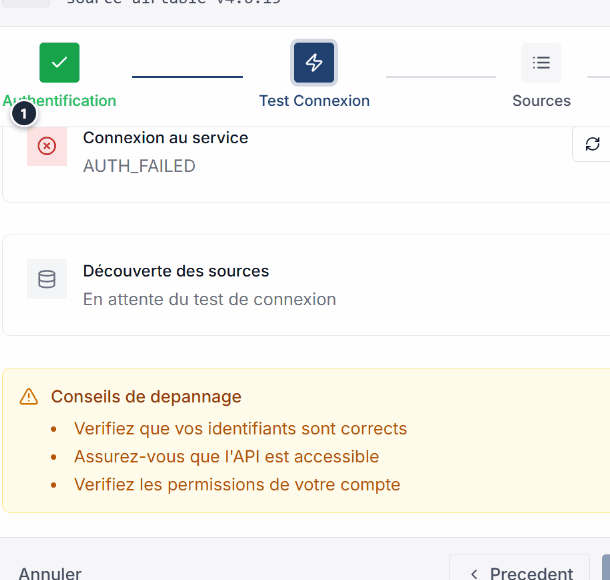
Common errors
| Error | Likely cause | Solution |
|---|---|---|
| 401 Unauthorized | Invalid or expired API key | Regenerate the key in the provider's console. |
| 403 Forbidden | Insufficient scopes or permissions | Check the permissions of your key. |
| Timeout | Service temporarily unavailable | Try again in a few minutes. |
Step 3 — Select data streams
After a successful test, Ontologie discovers the available streams from your source. Check the streams you want to synchronize.
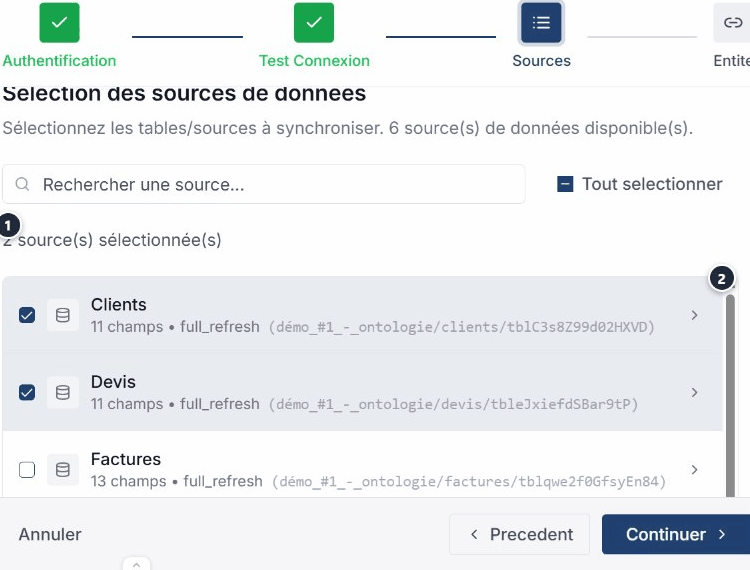
Tip
Start with one or two streams, then add more if needed. Each stream generates a tab in the source-linked spreadsheet.
Start with one or two streams, then add more if needed. Each stream generates a tab in the source-linked spreadsheet.
Step 4 — Link to an entity
Select the target entity in your ontology to receive the synchronized data.
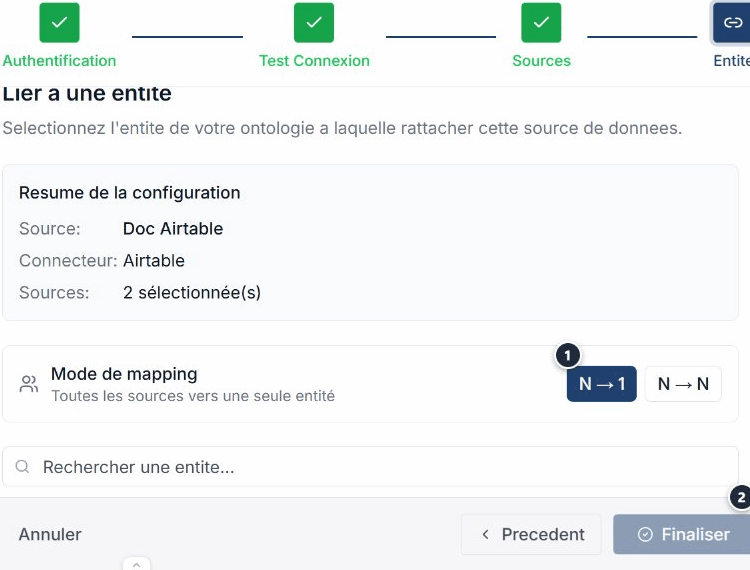
Tip
You can also link the source later from the Sources tab of the entity in the ontology.
You can also link the source later from the Sources tab of the entity in the ontology.
Expected outcome
Active connector
Synchronization starts and data appears in the source-linked spreadsheet of the target entity.
Synchronization starts and data appears in the source-linked spreadsheet of the target entity.
See also
- Connectors — Browse the catalogue and add a connector.
- Data Sources — Manage all your configured sources.
- Entity linking — Connect your sources to the ontology.
- Diagnostics — Identify and fix connection errors.
Need help?
Write to us: Support and contact.