Modeler (Canvas)
At a glance
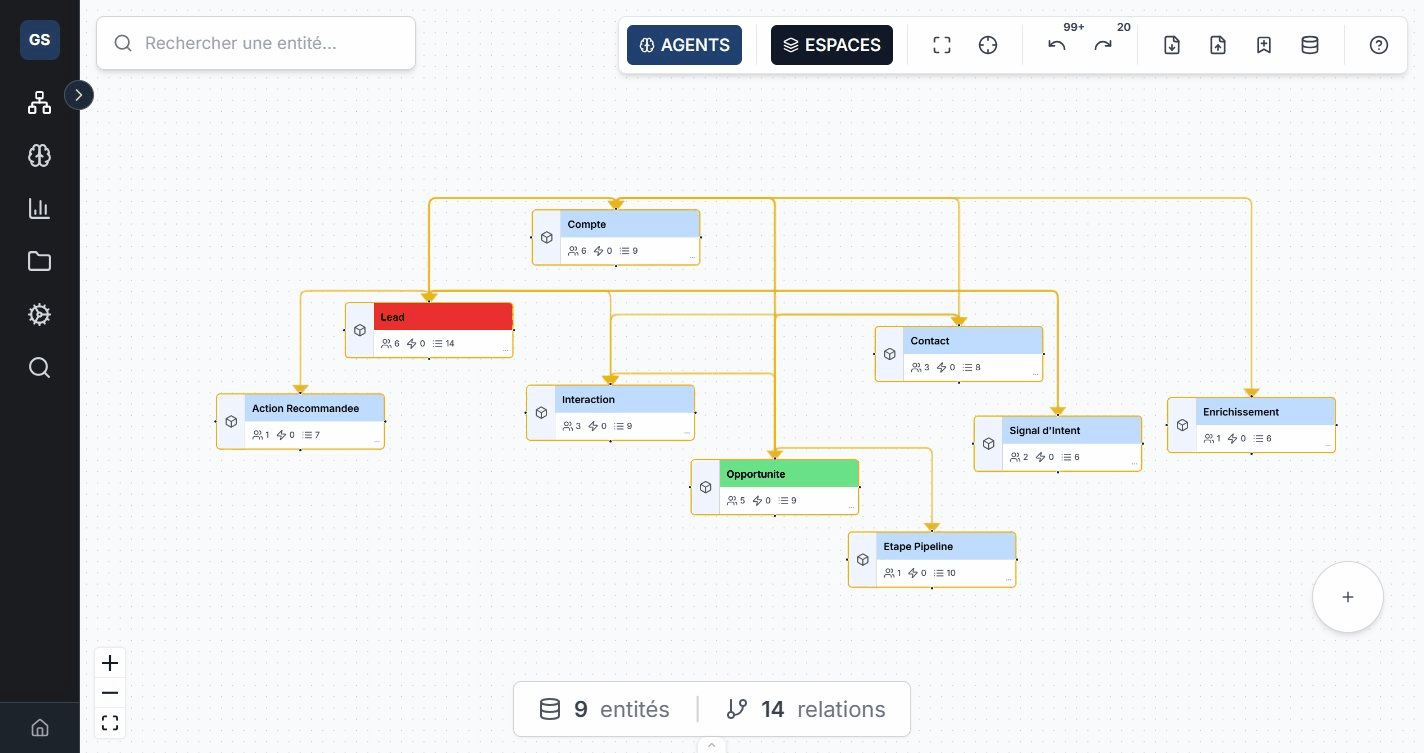
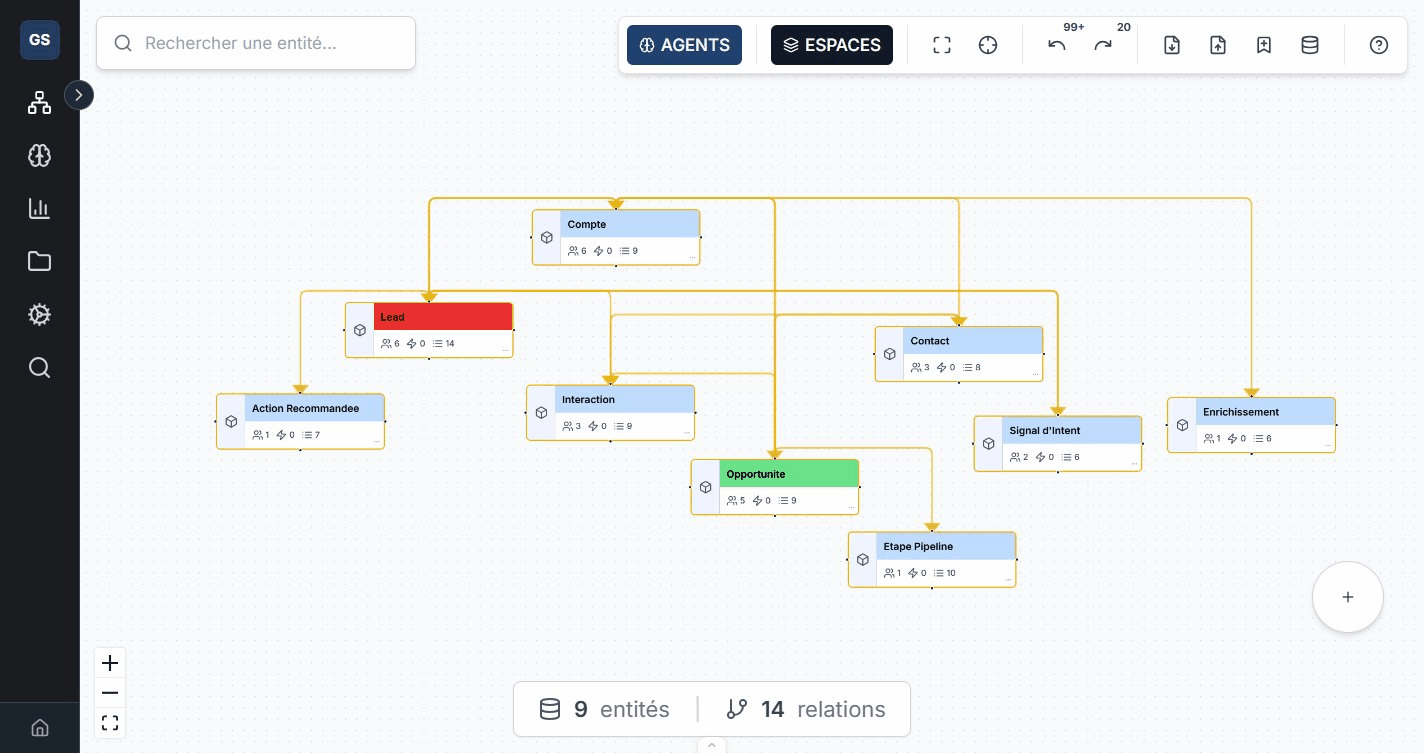
The Modeler is the visual canvas for building your ontology. Drag, connect, and organize your entities in an interactive workspace.
Before you start
- You have access to an Ontologie workspace.
- At least one workspace has been created (a default space exists when the workspace is created).
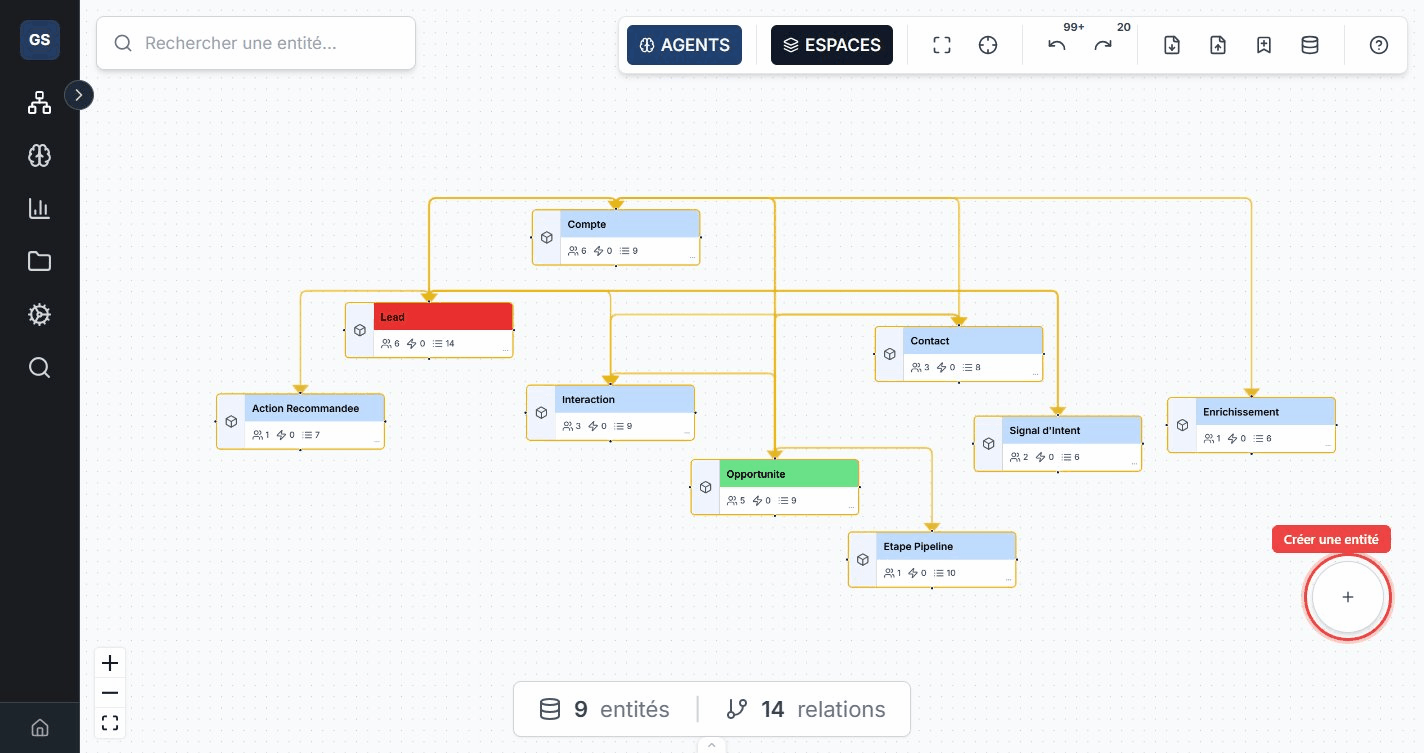
Create an entity
- Click the + button (bottom right of the canvas).
- Give your entity a name (for example "Supplier").
- Choose a type: Object, Link, Interface, or Cluster.
- Confirm: the entity appears on the canvas.
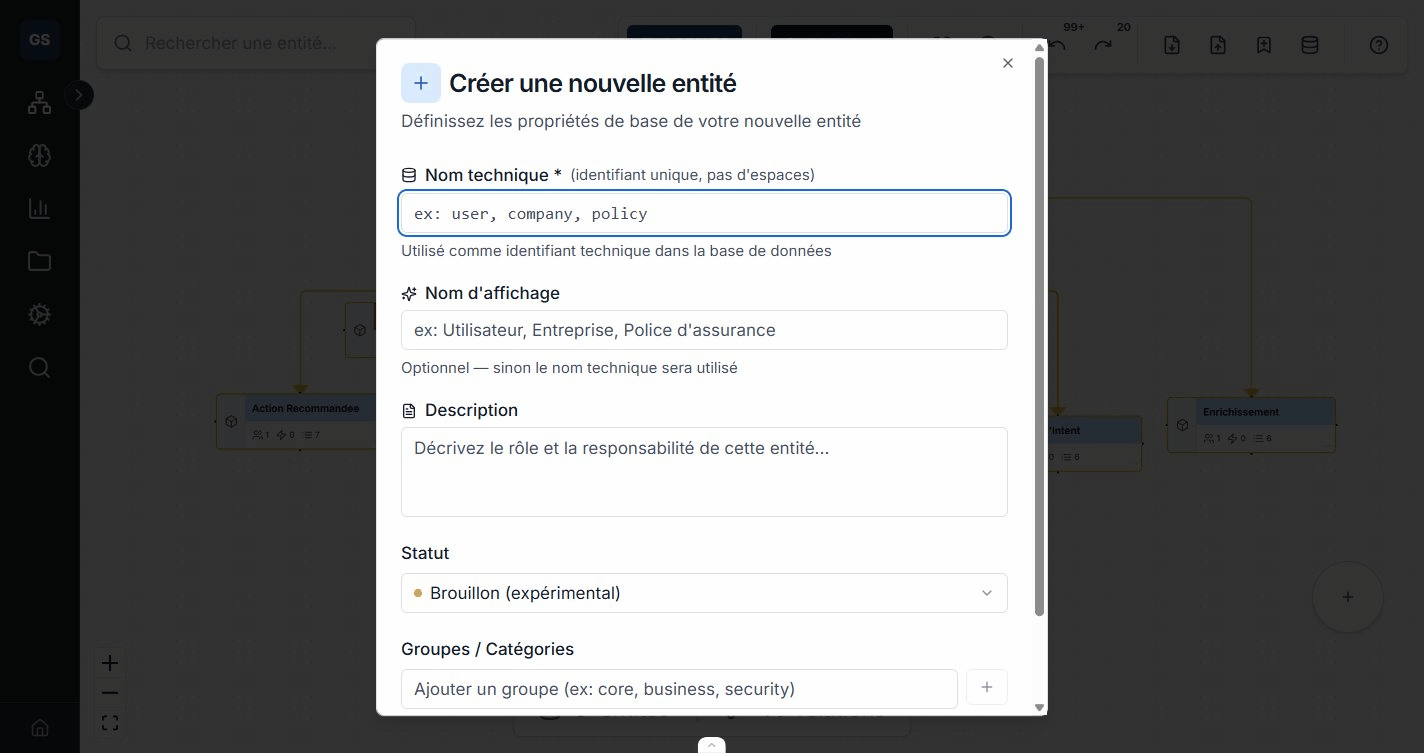
The most common type is Object (ObjectType). Use it to represent your business concepts (Client, Product, Order, etc.). The Link type is for modeling complex relations with their own properties.
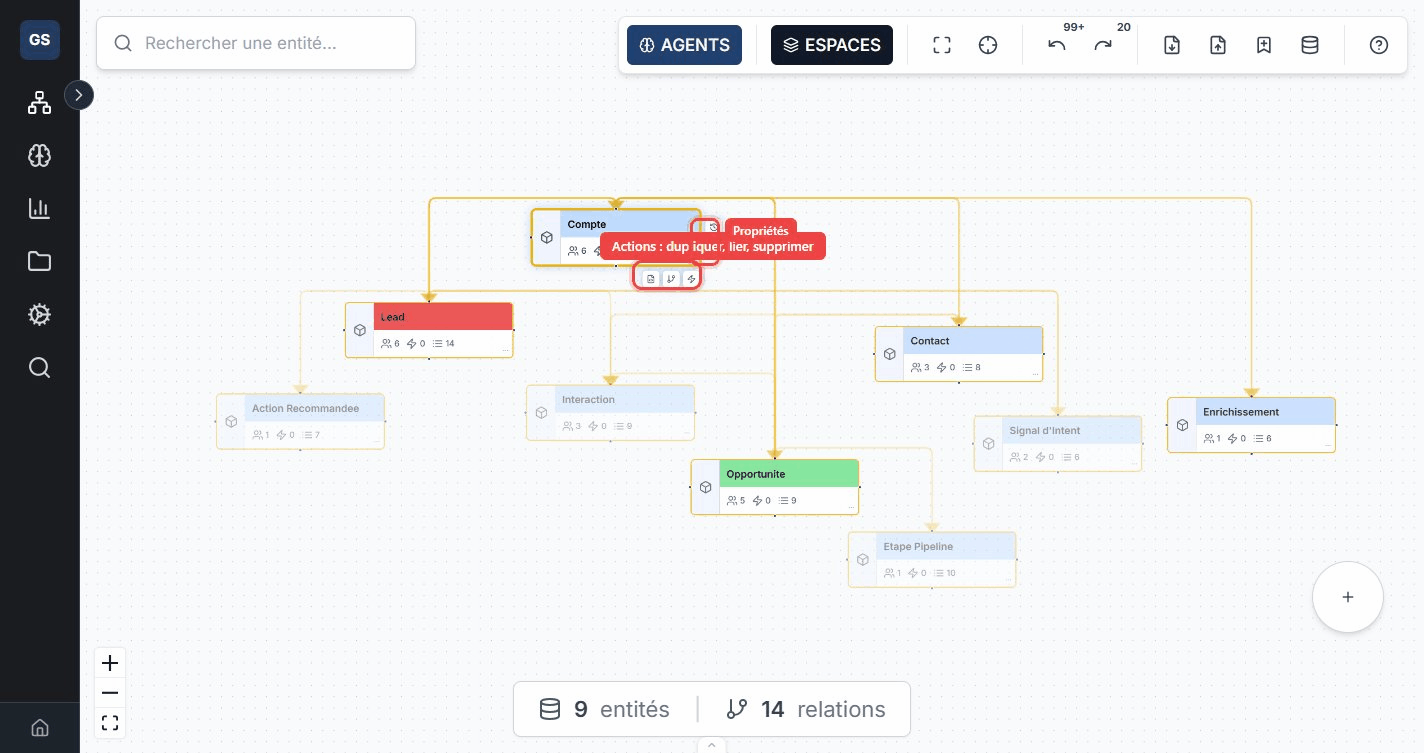
Entity card
Each entity on the canvas displays a visual summary:
- Icon and name in the header, with a customizable color.
- Counters: number of properties, relations, and attached actions.
- Status badge: Experimental (purple), Active (green), Validated (blue), or Deprecated (red).

Create a relation
Link two entities to represent a dependency or business connection:
- Select a source entity.
- Click the Relation icon in the entity action bar.
- Choose the target entity, the relation name, and its cardinality.
Cardinality types
| Cardinality | Meaning | Example |
|---|---|---|
| One to one | An entity is linked to exactly one other. | An Employee "has" a Badge. |
| One to many | An entity is linked to several others. | A Supplier "delivers" multiple Products. |
| Many to one | Several entities point to a single one. | Multiple Orders "belong to" a Client. |
| Many to many | Several entities are linked to each other. | Products "are in" multiple Categories. |
Entity properties
Click an entity then open the Details tab to define its properties. Each property has a name, a data type, and optional constraints.

Property types
| Type | Description | Example |
|---|---|---|
| Text | Character string. | name, address, description |
| Number | Numeric value (integer or decimal). | unit_price, quantity |
| Boolean | True or false. | is_active, in_stock |
| Date | Date and/or time. | created_at, delivery_date |
| List | Collection of values. | tags, categories |
| Object | Nested JSON structure. | full_address, coordinates |
| Reference | Link to another entity. | supplier_id → Supplier |
Property templates
To speed up data entry, pre-configured templates are available: Email, Phone, Price, URL, Created date, Status, Location, Tags, etc. Each template includes the correct type, validation constraints, and display format.
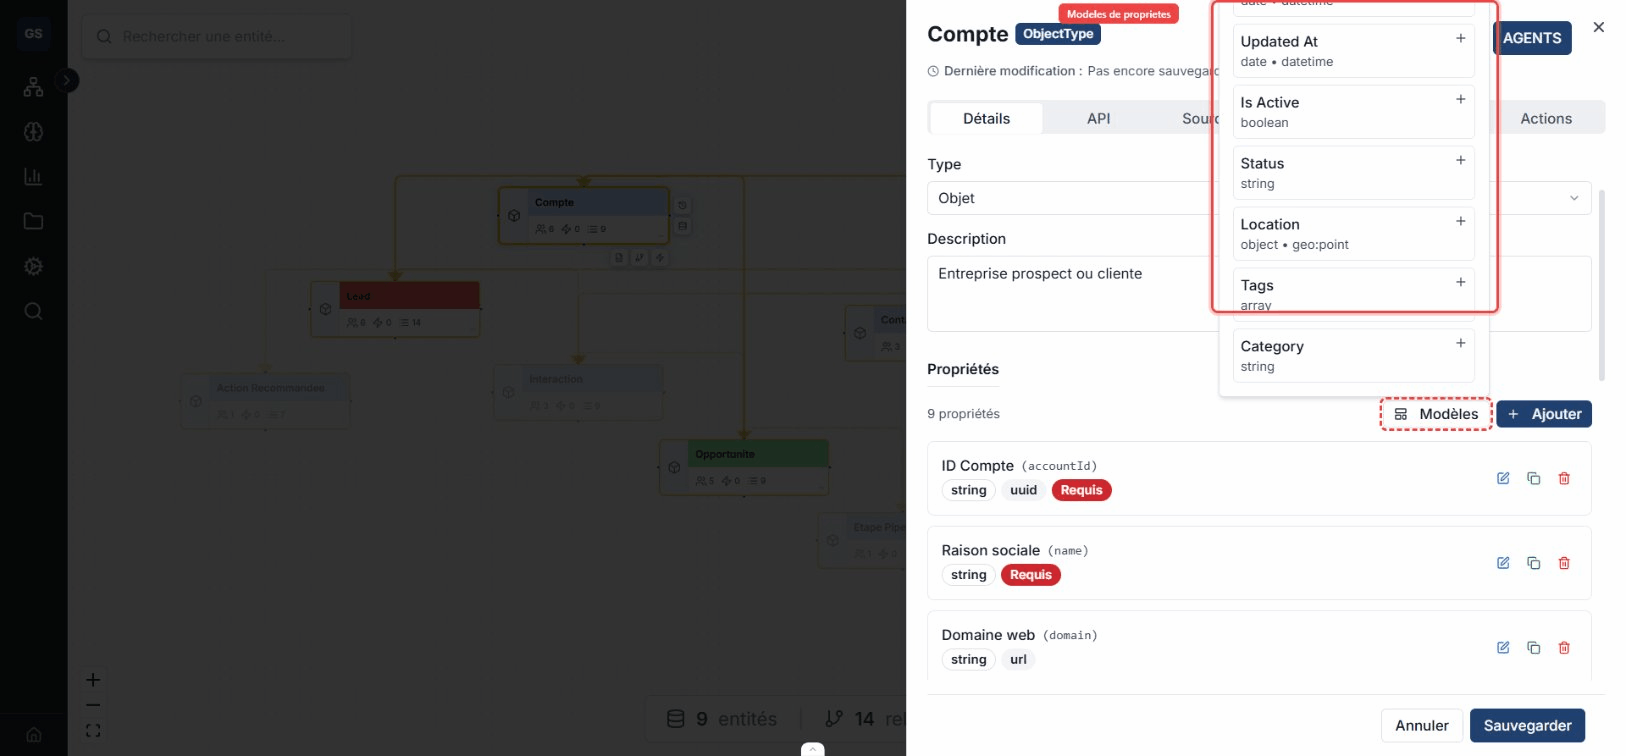
Example: add the "email" property via the Email template. The type is automatically set to Text with email format validation -- no need to define the regex manually.
Entity detail panel
Click an entity to open the side panel with six tabs:
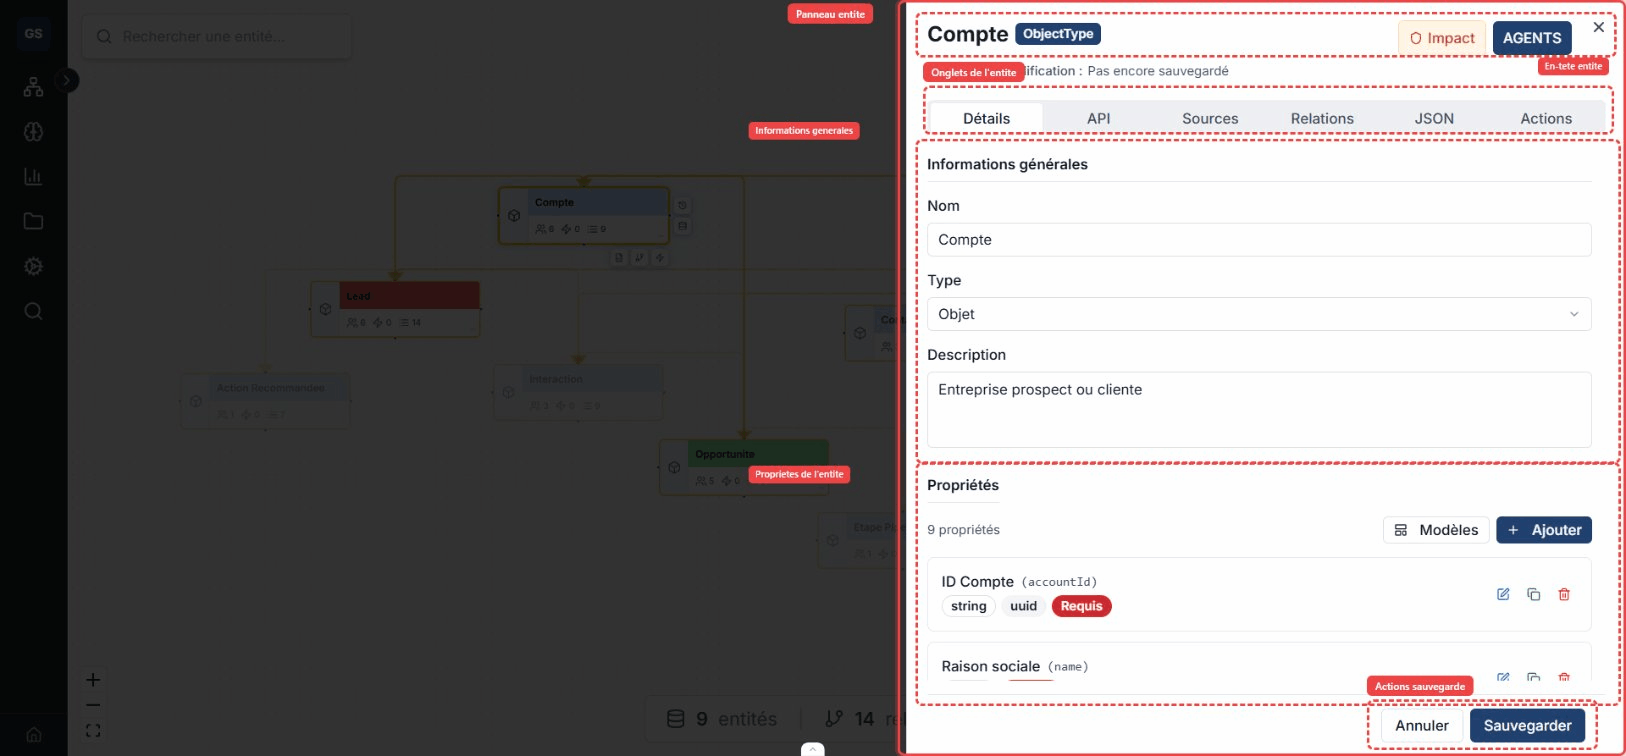
Details tab
General information (name, description, status, groups), properties with types and constraints, and appearance (color, icon).
API tab
Each entity automatically exposes REST endpoints. This tab lists the available endpoints (GET, POST, PUT, DELETE) with call examples. You can test an endpoint directly or simulate it.

Example: the "Product" entity generates a
GET /api/queries/entities/Produitto list all products, and aPOST /api/commands/executeto create a new one.
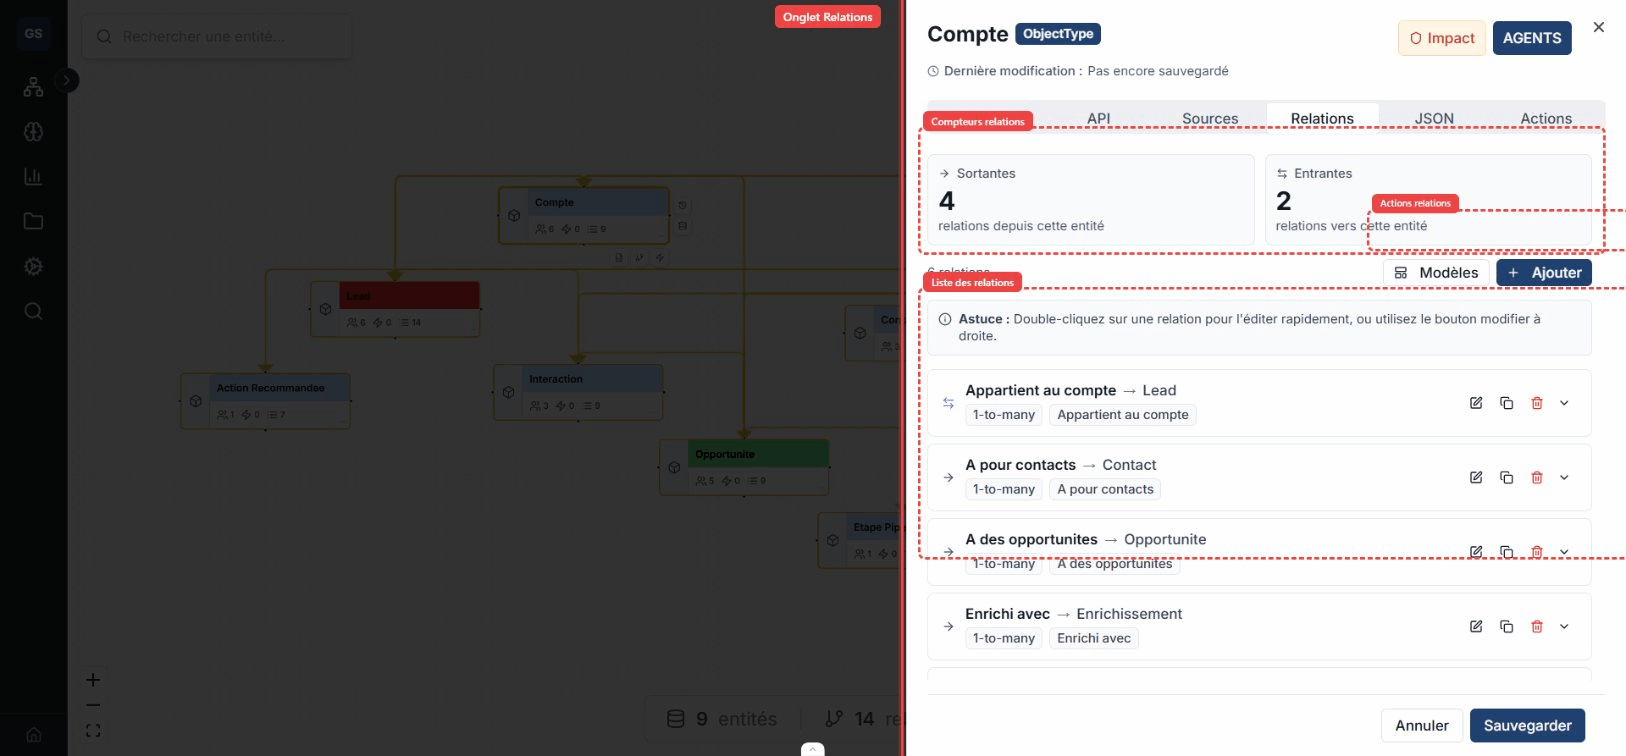
Relations tab
Complete view of the entity's incoming and outgoing relations, with cardinality type and target entity.
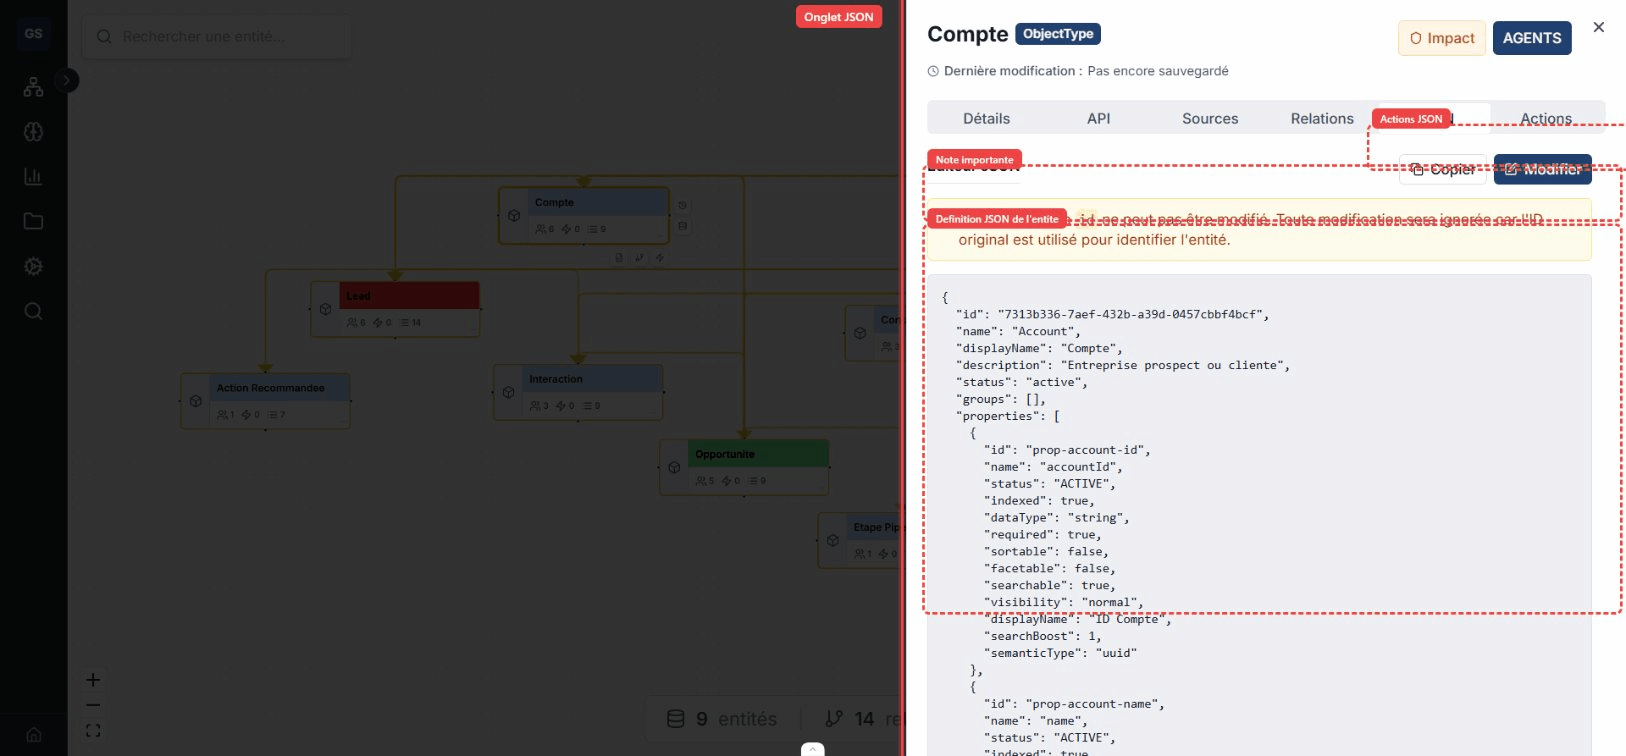
JSON tab
Raw view of the entity's JSON schema. Useful for copying the definition or editing it directly.
Actions tab
Configure triggerable actions on this entity: name, description, type, and trigger (manual, scheduled, or on event).
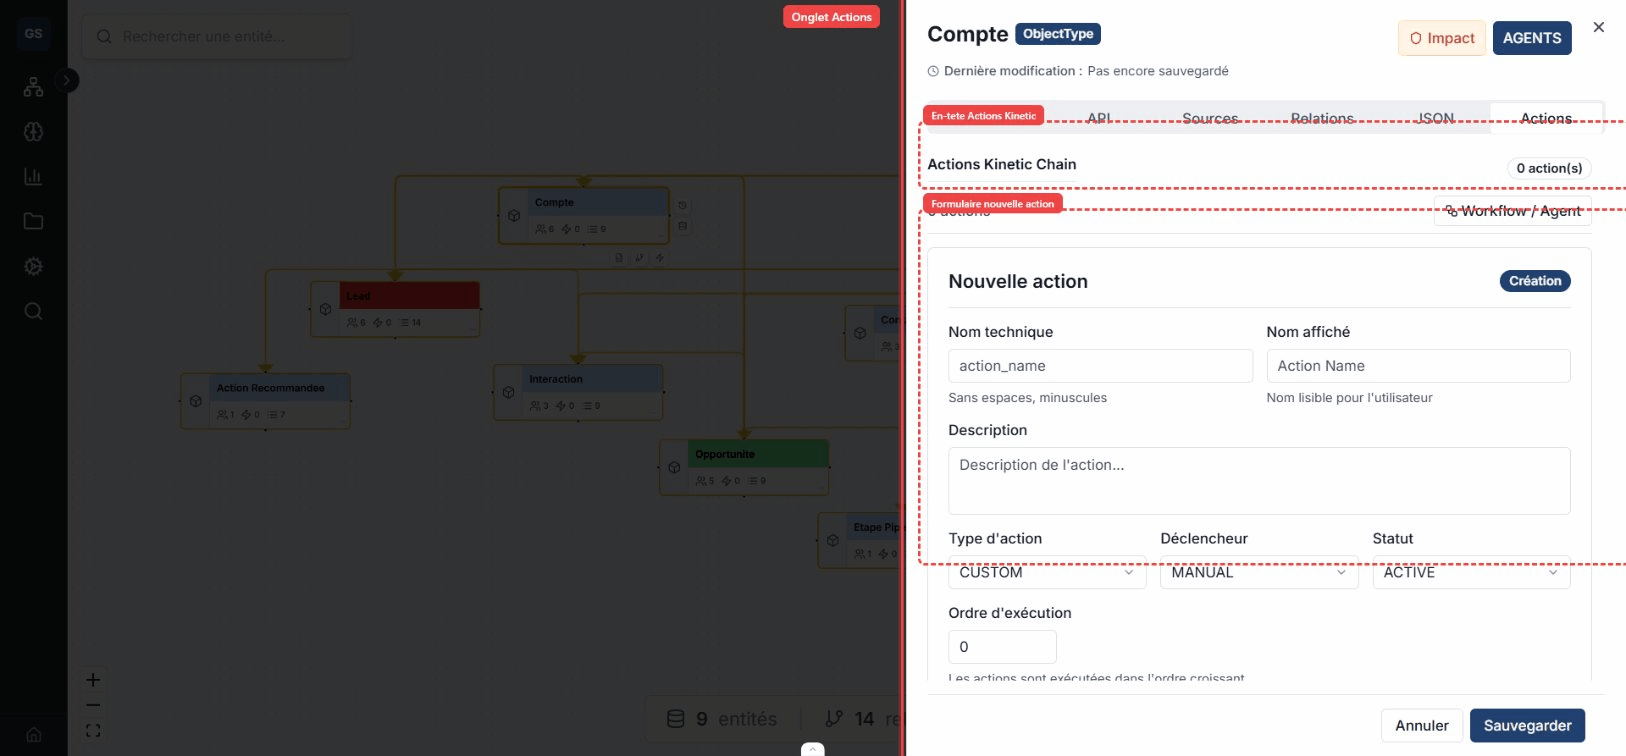
Example: create a "Notify the manager" action triggered automatically when an Order's status changes to "Shipped".
Toolbar
The toolbar at the top of the canvas provides access to the main functions:
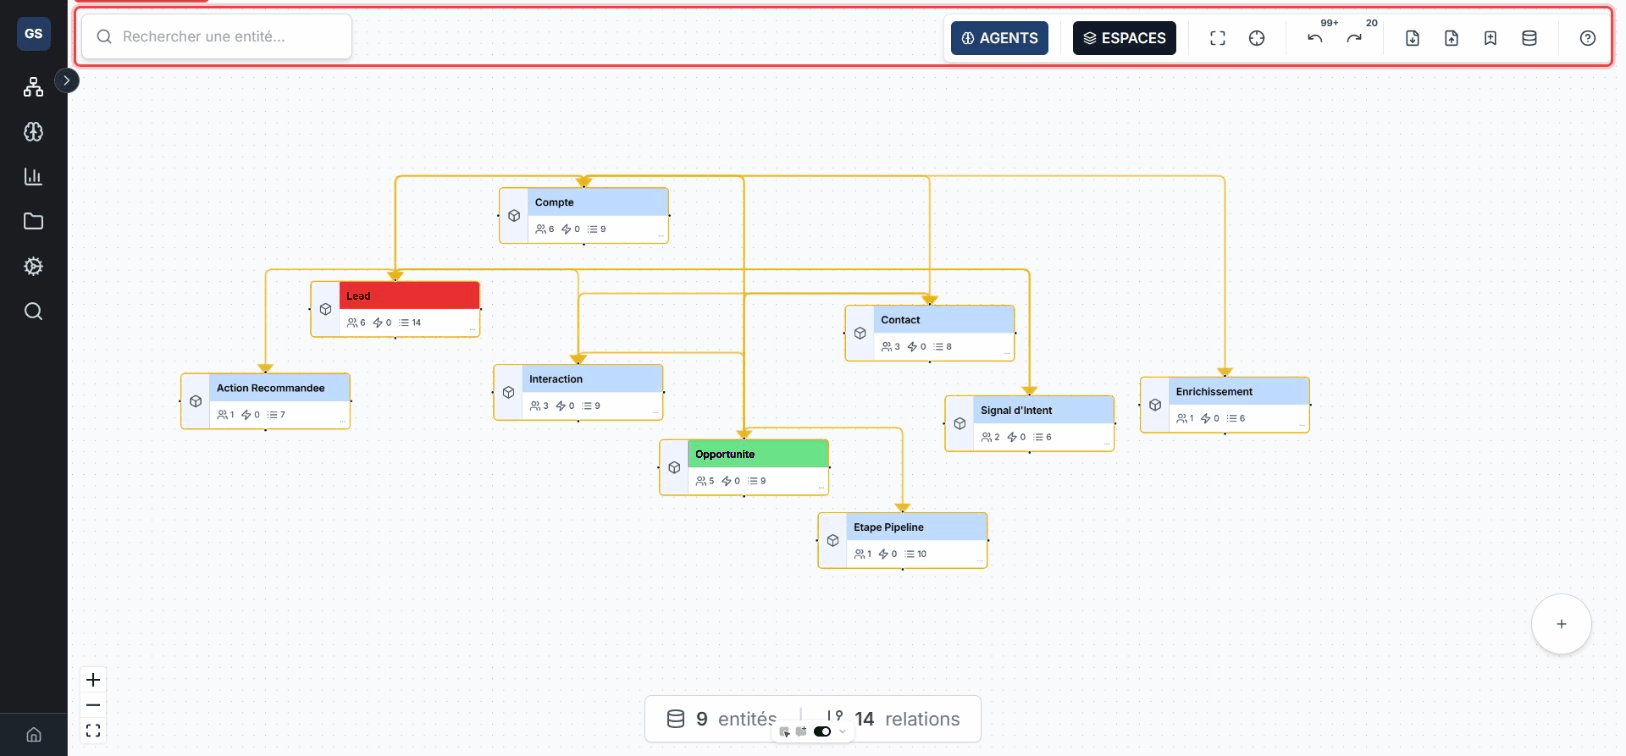
- AGENTS: opens the AI agent panel to ask questions about your ontology.
- SPACES: switches workspace or creates a new one.
- Fit view: re-centers the canvas to show all entities.
- Import / Export: import or export your ontology in YAML format.
- Undo / Redo: full history of your changes (Ctrl+Z / Ctrl+Y).
Agents panel (AI)
The Agents panel lets you chat with an AI assistant directly from the canvas. Ask natural-language questions about your ontology, request suggestions, or analyses.
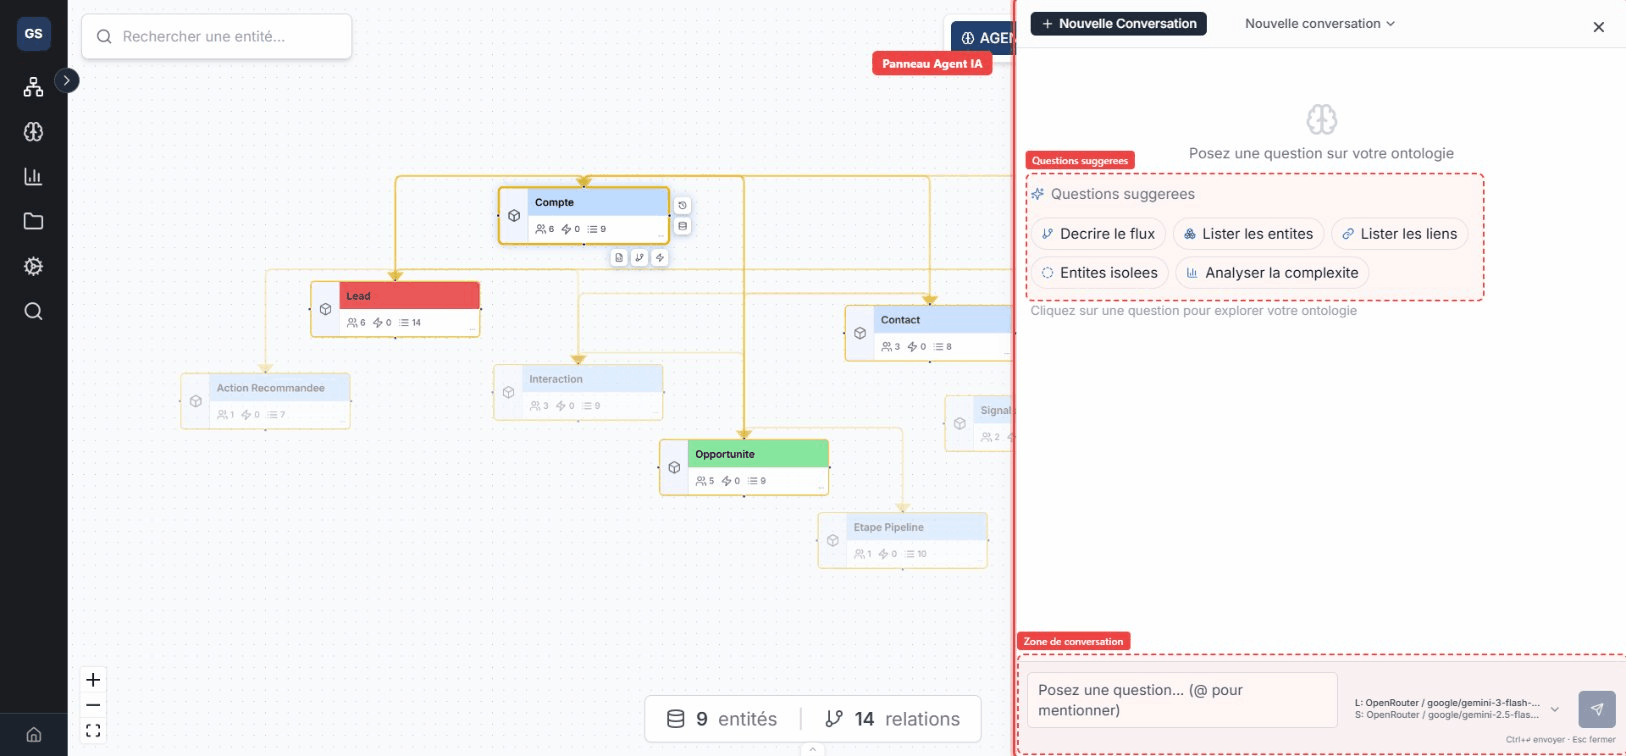
Example questions:
- "Which entities are related to Supplier?"
- "Add an email property to the Client entity"
- "How many outgoing relations does the Order entity have?"
Search
Use the search bar (shortcut: Ctrl+K) to quickly find an entity by name. Results appear in real time and clicking one centers the canvas on the found entity.
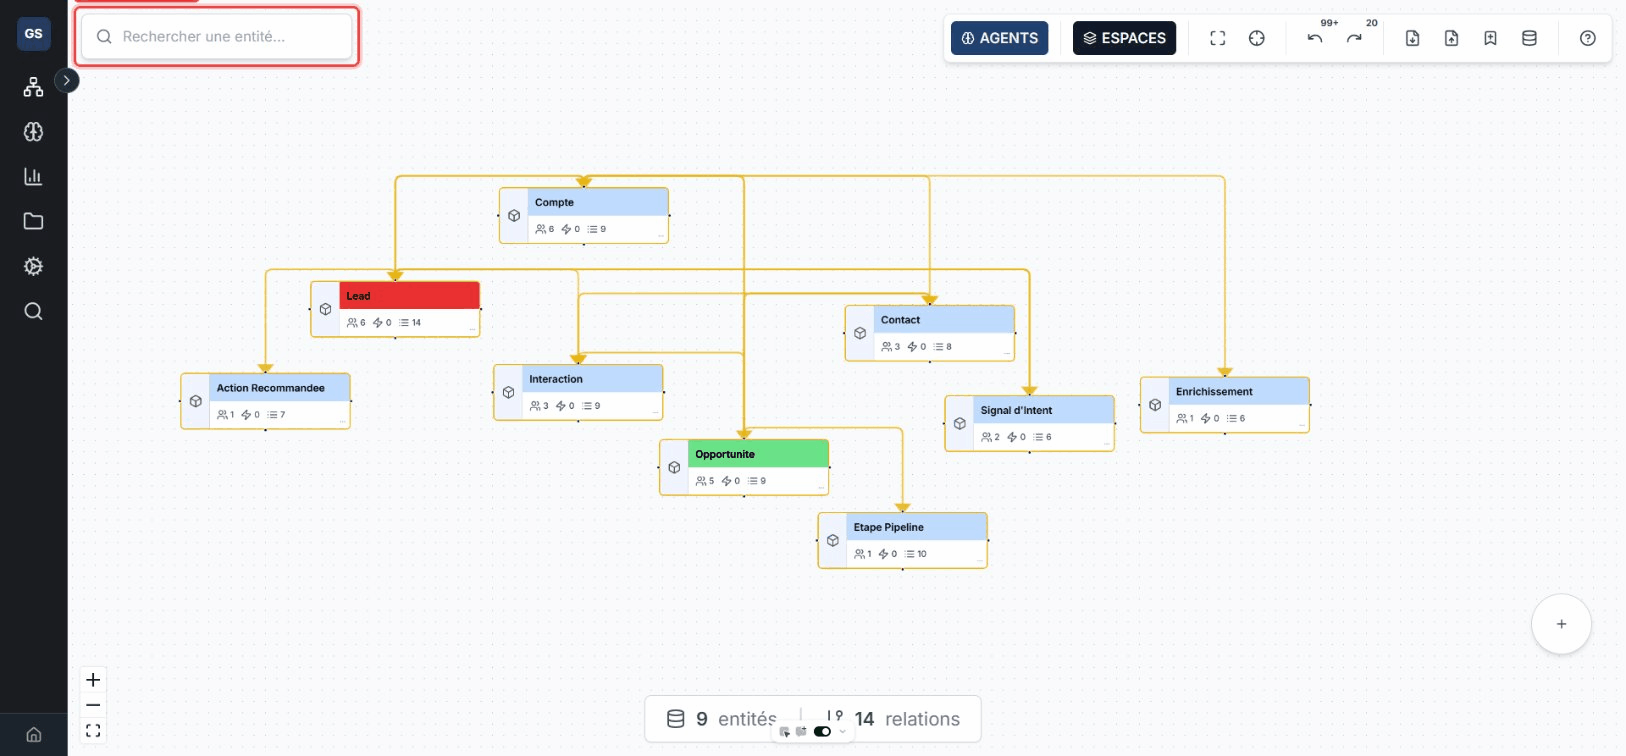
Status bar
At the bottom of the canvas, the status bar displays the total number of entities and relations in the current space.

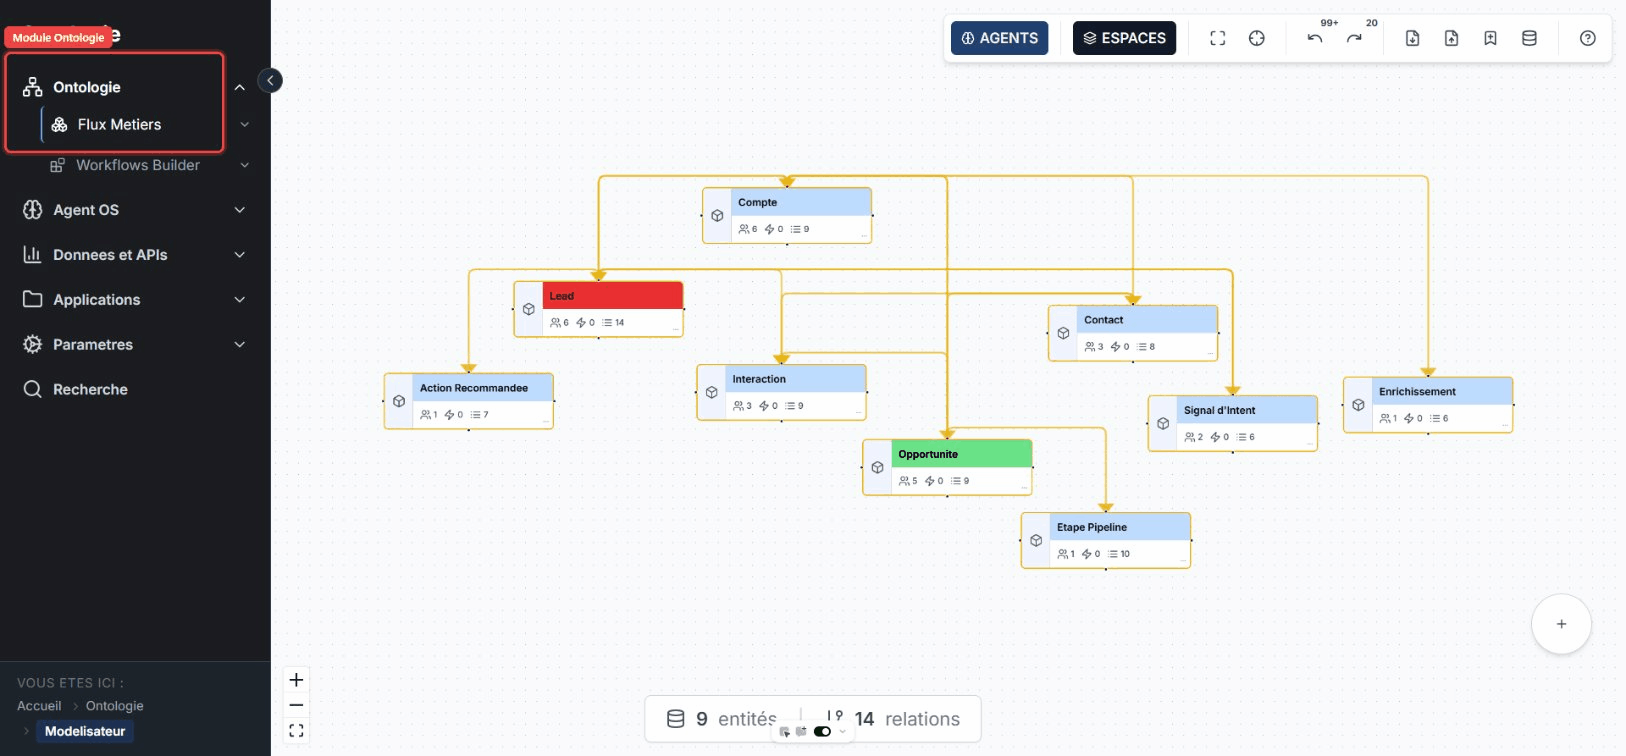
Navigation
Find the Ontology from the sidebar, under the Applications section.
Expected outcome
Your ontology is visually modeled: entities created, relations drawn, properties defined, and actions configured. The canvas reflects the complete structure of your business domain.
Limits and common issues
- The canvas can become crowded beyond 100 entities in a single space. Use Spaces to segment your model.
- If an entity does not appear, check that you are in the correct workspace.
- Changes are saved automatically. Use Ctrl+Z to undo an unintended action.
Need help?
Write to us: Support and contact.